Today's manicure begins with a gradient of Sinful Shine My Kryptonite and Sinful Shine In The Limelight.

These are the steps I use to create a gradient. *Normally, I will paint one coat of the lightest color that the gradient will contain as a base color for the gradient polishes to grab on to (or a coat of white for a neon gradient). This time, however, I forgot to start with a base color, doh!, and just started with plain base coat.* Using the back of a metal stamping plate for a palette, I placed some Kryptonite and some In The Limelight next to each other. Taking a small piece of cosmetic wedge sponge (very lightly dampened with water and squeezed out), I dipped the sponge into both colors at once, and lightly dabbed it onto the nail keeping the lighter color toward the tips, and darker color toward the cuticle. Since I forgot the base color, the polishes didn't want to *grab*, and I had to repeat the dabbing 3 or 4 times for each nail (waiting a bit between dabs to let the polish dry) to reach desired opacity. I then added a layer of Seche Vite to smooth out the gradient.
Next, I used individual holographic glitter pieces from Sinful Colors Watch It Shine, stacked against each other to create a wavy pattern down the length of the nail.
For this step, I used the 'water marbling tool' from my Bundle Monster Nail Art Kit to fish the glitters from the bottle and place them in a stacked design. This was not as tedious as I had thought it would be, it took maybe 5 minutes to complete each hand.
The diamond glitters have lots of pointy sharp edges, so it took 3 or 4 coats of Gelous gel top coat to smooth them out completely. When applying the Gelous, I kept it concentrated to the strip of glitter, rather than covering the entire nail with each coat. When they were fully smoothed over, I finished the manicure with a layer of Seche Vite top coat.
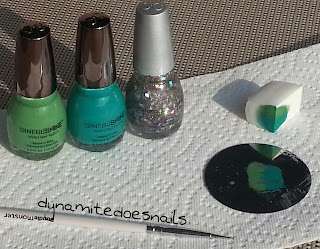
Below is a picture of the polish and materials used for this design, minus base and top coat.
Products Used:
One coat Beauty Secrets Moisturizing Base Coat
Gradient of Sinful Shine My Kryptonite and In The Limelight
One coat Seche Vite Top Coat
Glitter accents from Sinful Colors Watch It Shine
Four coats Gelous Advanced Gel Top Coat (Concentrated to the strip of glitter)
One coat Seche Vite Top Coat


